Introduction to Delicious Bars Recipe
Are you a young professional looking for a convenient yet healthy snack? If so, welcome to your kitchen adventure! Homemade bars are a game changer for busy lifestyles. Let’s dive into why crafting your own bars can transform your snacking habits.
Why Homemade Bars Are a Game Changer for Young Professionals
Time is of the essence for many of us in the 25 to 35 age bracket. Between juggling work, social life, and perhaps even further education, grabbing snacks can often lead to unhealthy choices. That’s where a bars recipe comes in handy.
Creating your own bars allows you to control the ingredients, ensuring you’re fueling your body with nutritious options. Think about it: when you make these at home, you can pack them with wholesome ingredients like oats, nuts, and seeds, while skipping out on the preservatives and hidden sugars often found in store-bought versions. According to the American Heart Association, balancing your snacks with healthy choices can make a significant difference in your overall well-being.
Convenient and Customizable
Another fantastic aspect of homemade bars is customization. From sweet to savory, the possibilities are endless! Want nutty and chewy? Add almonds and honey. Prefer something fruity? Throw in some dried cranberries or bananas. Personalize each batch to reflect your taste and nutritional needs.
Here are a few benefits of making your own bars:
- Cost-effective: Store-bought bars can be pricey, but making them at home can save you money.
- Easier portions: You can control the size and portion, avoiding the temptation to eat multiples if they’re smaller than a traditional snack.
- Keep dietary restrictions in mind: Whether you’re vegan, gluten-free, or just watching your sugar intake, homemade options allow total freedom to adhere to your dietary preferences.
Are you ready to embrace this culinary magic? With a simple bars recipe, you can whip up a batch of energy-boosting delights that keep you on the go without sacrificing health. For some inspiration on ingredients and flavors, check out resources from the Academy of Nutrition and Dietetics that focus on whole foods and nutritional guidelines.
Embrace the joy of making your own bars, and your busy days will become a little more delicious!
Ingredients for Homemade Bars
Essential ingredients list
To achieve a delightful homemade bars recipe, gather the following essential ingredients:
- Oats: Use rolled oats for texture.
- Nut Butter: Choose creamy almond or peanut butter for binding and flavor.
- Sweetener: Maple syrup or honey works wonderfully for sweetness and moisture.
- Seeds: Flaxseeds or chia seeds provide a nutritious touch.
- Dried Fruit: Go for raisins, cranberries, or apricots for added sweetness and chewiness.
- Nuts: Almonds, walnuts, or pecans give crunch and healthy fats.
- Cocoa Powder or Protein Powder: Optional, but they can enhance flavor and nutrition.
Notes on ingredient quality and alternatives
Quality ingredients make all the difference! Opt for organic oats and nut butters when possible, as they often use fewer additives. If you’re allergic to nuts, seed butters like sunflower seed butter are excellent alternatives. For sweeteners, consider agave syrup as a vegan-friendly option. Dried fruits can be substituted with chocolate chips if you’re craving a treat!
Baking bars can be a fun way to explore different flavors. Feel free to experiment with spices like cinnamon or vanilla extract to make your bars uniquely yours. Looking for more nutritious alternatives? Check out nutrition-focused sites like Healthline for creative ideas!
Step-by-Step Preparation of Homemade Bars
Making homemade bars is not just a fun cooking project; it’s a delightful way to indulge in something sweet while knowing exactly what goes into it. Let’s walk through the journey of creating your own batch of bars. Grab your apron, and let’s get started!
Gather Your Ingredients
The first step in our bars recipe process is to prepare all your ingredients. Having everything ready to go makes the mixing and baking so much easier. Here’s what you’ll need:
-
For the crust and topping:
-
1 cup all-purpose flour
-
1/2 cup rolled oats
-
1/2 cup brown sugar
-
1/2 cup unsalted butter (melted)
-
1/2 teaspoon salt
-
1/2 teaspoon baking powder
-
For the caramel layer:
-
1 cup sugar
-
1/4 cup water
-
1/2 cup heavy cream (or use coconut cream for a dairy-free option)
-
1 teaspoon vanilla extract
Pre-measuring these ingredients can save time and reduce stress as you dive into the mixing and baking phases. And don’t forget to preheat your oven to 350°F (175°C), so it’s ready when you are!
Mixing the Dough
Now that you have everything laid out, it’s time to mix the dough. In a large mixing bowl, combine the flour, oats, brown sugar, salt, and baking powder. Stir these dry ingredients together until they are well combined.
- Tip: A whisk can be your best friend here; it helps aerate your mixture, allowing for an even texture.
Once the dry ingredients are mixed, slowly pour in the melted butter and stir until the mixture starts to clump together. You’re aiming for a crumbly texture that will form a solid base when pressed into the pan. This dough will not only serve as a base but also as a topping. Talk about versatility!
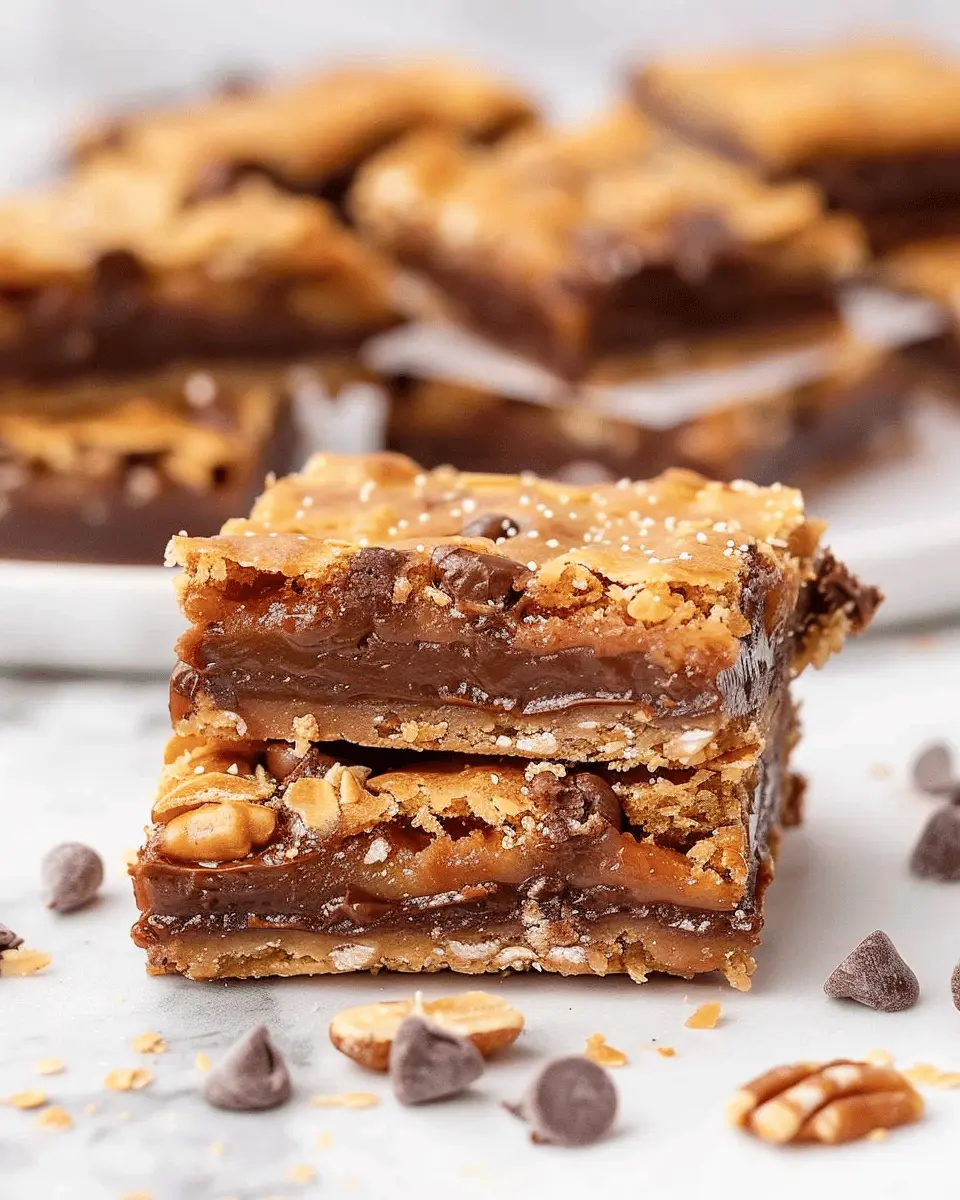
Creating the Caramel Layer
Here comes the fun part—layering the caramel! In a medium saucepan over medium heat, combine the sugar and water. Stir until the sugar dissolves, and then let it boil without stirring until it turns a deep amber color.
- Safety First: This is hot sugar, so be careful not to touch it!
Once you’ve achieved that luscious golden hue, remove it from heat, and carefully stir in the heavy cream. The mixture will bubble up, so be gentle. Finally, add in the vanilla extract for a boost of flavor. This caramel layer is the star of the show in your bars recipe.
Layering The Dough
Now, let’s assemble our bars! Take about two-thirds of the dough mixture and press it evenly into the bottom of a greased 8×8-inch baking pan, ensuring an even base. Pour the prepared caramel on top of the crust, spreading it out evenly.
Next, crumble the remaining dough mixture over the caramel layer. This will create a beautiful, textured topping when baked. Sprinkle the topping sparingly; you want the caramel to peek through a little!
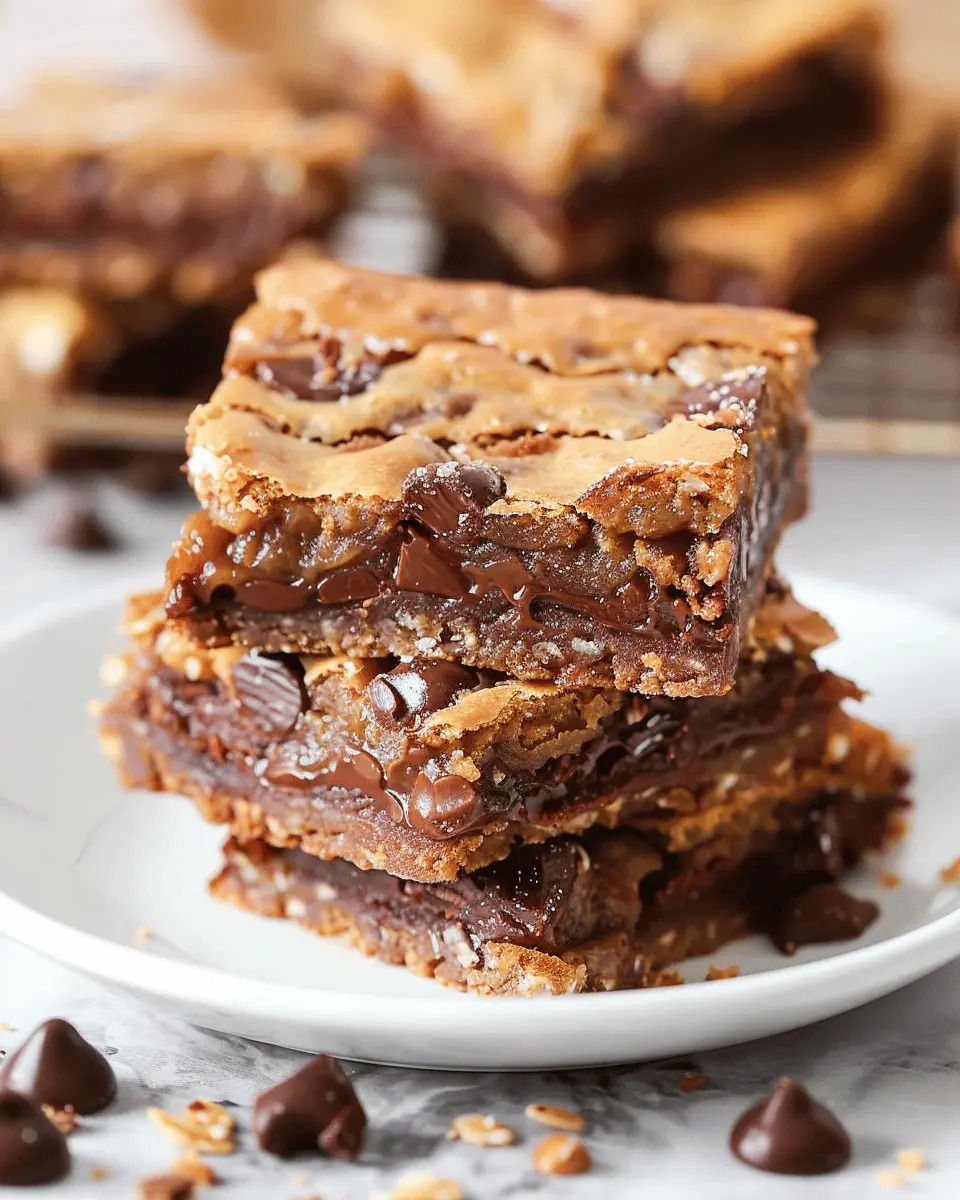
Bake to Perfection
Pop your assembled bars in the preheated oven and bake for about 25-30 minutes, or until the topping turns a lovely golden brown. The smell wafting through your kitchen at this point will be nothing short of heavenly.
Once baked, allow the bars to cool in the pan before slicing into squares. This is often the most challenging part—waiting to dive in!
Enjoy your homemade bars as a delightful snack or dessert. If you’re looking to mix things up, try adding nuts or dried fruits to your bar mixture for extra texture and flavor.
Remember, baking is as much about enjoying the process as it is about savoring the outcome. So gather your friends or enjoy a quiet moment with your favorite beverage as you bite into your delicious creations. For more delightful dessert inspirations, check out The Kitchn or Food Network. Happy baking!
Variations on Homemade Bars
When it comes to homemade bars, the flavor possibilities are endless. Let’s explore two delightful variations that are sure to impress your friends and satisfy your craving for something sweet.
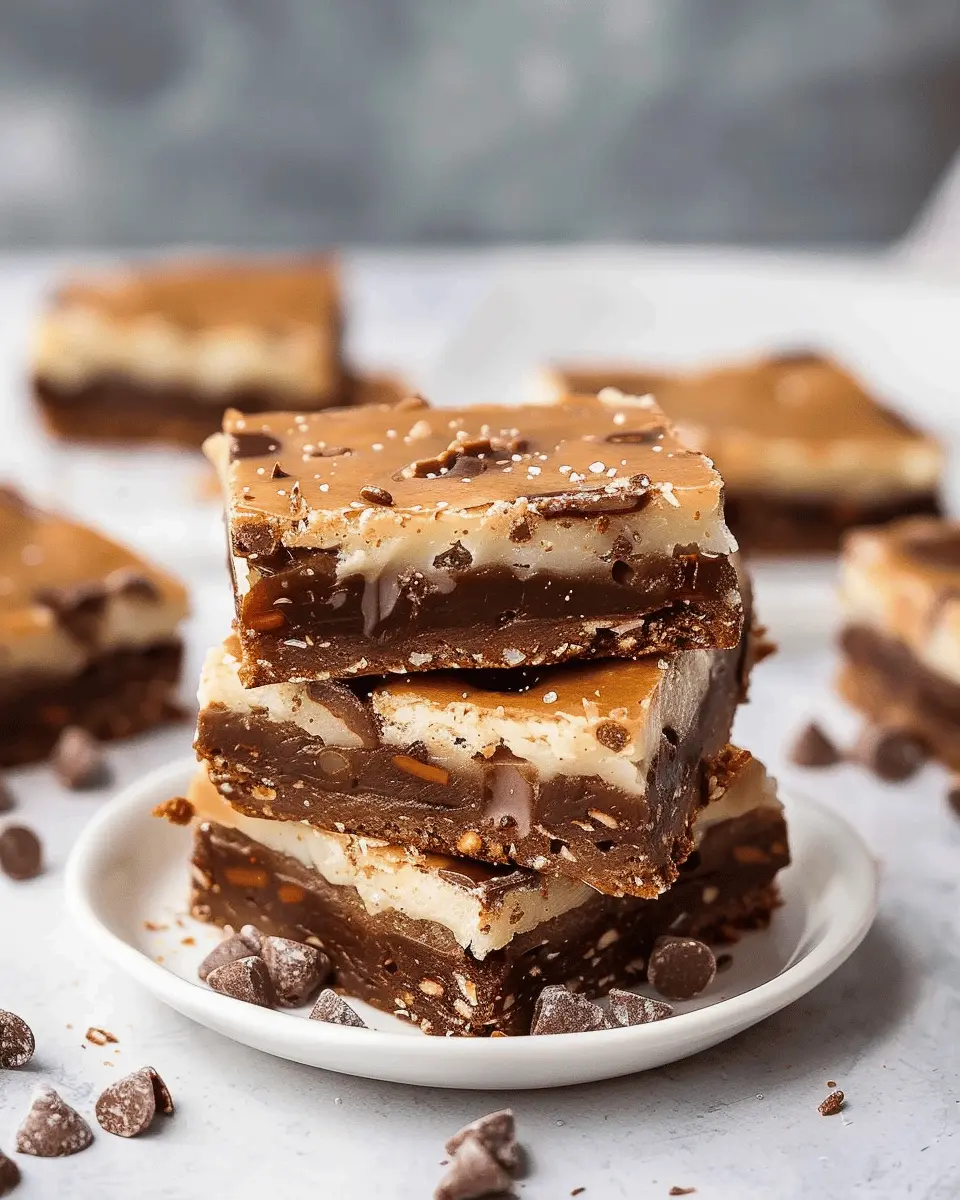
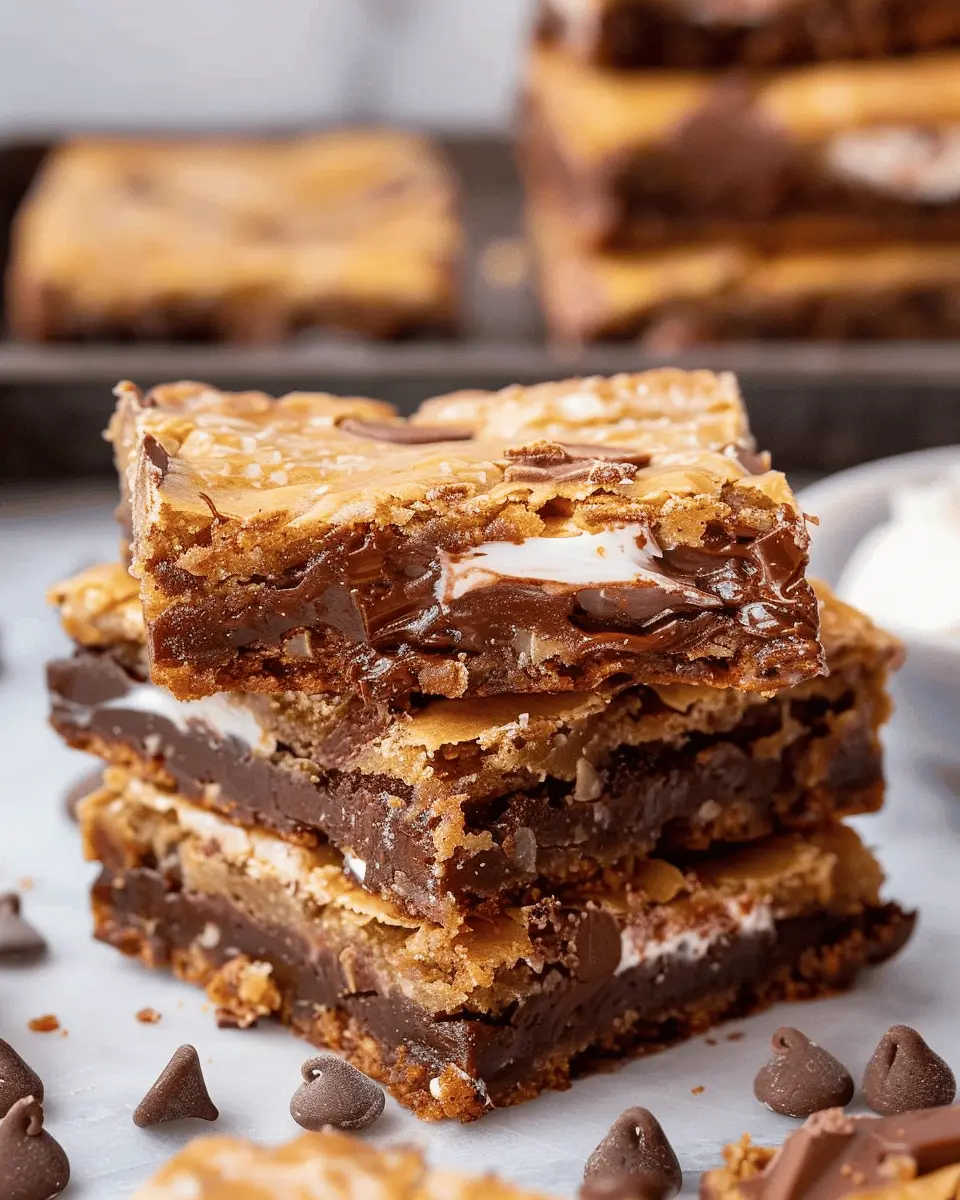
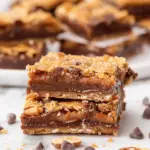
Nutty Chocolate Caramel Bars
These bars combine rich chocolate with crunchy nuts for an indulgence that’s hard to resist. Imagine biting into a layer of smooth chocolate, followed by a gooey caramel center, all topped with your favorite nuts.
Ingredients:
- 1 cup dark chocolate chips
- 1 can sweetened condensed milk
- 1 cup mixed nuts (e.g., almonds, walnuts, pecans)
- 1 cup graham cracker crumbs
Instructions:
- Preheat your oven to 350°F (175°C) and line a baking pan with parchment paper.
- Melt the chocolate chips in a double boiler and mix with sweetened condensed milk.
- Stir in graham cracker crumbs and nuts, mixing until combined.
- Pour the mixture into the prepared pan and spread evenly.
- Bake for 20-25 minutes or until set, let cool, and then cut into bars.
For a twist, consider using peanut butter chips or drizzling some melted white chocolate on top. You can check out more variations on chocolate and nut bars at Food Network.
Salted Caramel Pretzel Bars
This recipe strikes the perfect balance between sweet and salty—a combination that many of us adore. The crunch of the pretzels melds beautifully with the salted caramel, creating a texture that’s simply divine.
Ingredients:
- 2 cups crushed pretzels
- 1 cup brown sugar
- 1 cup unsalted butter
- 1 cup chocolate chips
- Sea salt for topping
Instructions:
- Preheat the oven to 350°F (175°C) and grease a baking dish.
- Mix the crushed pretzels with melted butter and brown sugar, pressing the mixture into the bottom of the dish.
- Bake for about 10 minutes, then sprinkle chocolate chips on top.
- Drizzle with salted caramel sauce and let cool before slicing.
The combination of sweet, salty, and crunchy in these bars can be quite addicting! You might want to check places like Serious Eats for additional variations on pretzel goodies.
Experiment with these recipes and enjoy the fun of making your own unique bars recipe! Whether you’re preparing them for a gathering or just for yourself, they’re sure to be a hit.
Cooking Tips and Notes for Homemade Bars
Tips for perfecting the caramel layer
To create a rich caramel layer in your bars, start by using high-quality ingredients—this really makes a difference. When melting sugar, keep the heat low to avoid burning. Stir constantly for full melting and color. If your caramel turns out grainy, don’t fret! Simply add a splash of water and heat gently until smooth again. Consider checking out detailed caramel techniques on Serious Eats for expert advice.
Troubleshooting common baking issues
Baking can sometimes be unpredictable, but knowing a few tricks can help! If your bars don’t hold together, it’s likely you didn’t use enough binding agents, such as flour or oats. A common issue is overbaking, leading to a dry texture—aim for a golden-brown finish. If you notice uneven baking, rotate your pan halfway through the baking time.
Armed with these tips for your bars recipe, you’re ready to impress your friends and family with your baking skills!
Serving Suggestions for Homemade Bars
How to present your bars for gatherings
When it comes time to show off your delicious bars recipe, presentation is key. Elevate your gathering by cutting your bars into even squares or rectangles, making them easy to grab. Arrange them on a beautiful platter, layering them slightly for an enticing view. Consider adding small labels or tags describing flavors for a fun touch. Surround the bars with fresh fruits like strawberries or blueberries to add a pop of color. Not only do these garnishes enhance aesthetics, but they can also inspire pairing ideas.
Pairing ideas for enhanced enjoyment
To truly elevate your homemade bars, think beyond just enjoying them solo. Pair them with:
- Fresh fruit: Apples, bananas, or citrus add a refreshing contrast.
- Yogurt or whipped cream: A dollop can add creaminess that complements the bar’s texture.
- Herbal tea or coffee: A warm beverage can enhance flavors and provide comfort.
Need some inspiration? Check out these pairing tips from Food & Wine to keep your guests talking about your dessert spread long after the gathering ends!
Time Breakdown for Homemade Bars
When you’re crafting your delicious homemade bars, knowing how to manage your time can make all the difference. Here’s a quick breakdown to help you plan your baking adventure.
Preparation Time
Getting everything ready for your bars recipe is crucial. Typically, you’ll spend about 15-20 minutes gathering your ingredients and preparing your baking pan. Make sure to have everything measured and organized for a smooth process.
Baking Time
Once your mixture is in the oven, it usually takes around 25-30 minutes to bake perfectly. Stay close by so you can keep an eye on them, as ovens can vary in temperature!
Total Time
All in all, from start to finish, you’re looking at about 45-60 minutes. This means you can whip up a delightful treat in no time, perfect for a snack or dessert. What’s your favorite way to enjoy bars?
Nutritional Facts for Homemade Bars
Estimated calories per serving
When you’re enjoying your homemade bars, knowing the estimated calories can help you balance your diet. Each serving typically contains around 200–250 calories, depending on the specific ingredients you choose. This makes them a satisfying snack without the guilt!
Key nutrition highlights
These bars recipe options are not just tasty; they’re packed with nutrients! Here are some highlights:
- Protein: With ingredients like nuts and seeds, you can find around 6–10 grams of protein per serving.
- Fiber: Whole grains boost your fiber intake, often offering 3–5 grams per serving, aiding digestion.
- Healthy Fats: Ingredients like nut butters or coconut oil provide essential fats that contribute to heart health.
For more on nutrition, the Harvard T.H. Chan School of Public Health offers excellent insights into making healthier choices. Remember, by customizing your bars, you can boost nutritional benefits while indulging your taste buds!
FAQs about Homemade Bars Recipe
When it comes to perfecting your bars recipe, you might have a few questions. Here are some of the most common inquiries sorted out for you!
Can I use alternative sweeteners for the recipe?
Absolutely! If you’re looking to cut back on sugar, alternative sweeteners can be a great option. Consider:
- Honey: A natural sweetener that adds a unique flavor.
- Maple Syrup: Perfect for a rich, amber-like sweetness.
- Stevia or Monk Fruit: Excellent low-calorie options that won’t spike your blood sugar.
Just remember, different sweeteners have varying levels of sweetness, so you might need to adjust the quantity accordingly.
How do I store leftover bars?
To keep your homemade bars fresh, here are a few smart storage tips:
- Refrigeration: Store them in an airtight container in the fridge. They can last up to a week.
- Freezing: If you want to keep them for longer, wrap each bar in plastic wrap and place them in a freezer bag. They can last for up to three months.
Make sure to label the container, so you remember when you made them—you wouldn’t want to miss out on that delicious treat!
What are some good substitutes for nuts in the recipe?
If you or someone you know has a nut allergy, don’t fret! Here are some nuts-free alternatives:
- Seeds: Sunflower or pumpkin seeds provide a nice crunch.
- Coconut Flakes: Adds a tropical twist and texture.
- Dried Fruits: Chopped dates, apricots, or raisins can add sweetness and chewiness.
Feel free to mix and match these options for your bars recipe. The possibilities are endless! For more tips, you can check out resources like The Spruce Eats for creative cooking ideas. Enjoy your bar-making adventure!
Conclusion on Homemade Bars Recipe
Recap of the Benefits of Homemade Bars
Homemade bars are a fantastic alternative to store-bought snacks, and the benefits are truly compelling. First off, you control the ingredients, allowing you to swap in nutritious options like oats, nuts, and dried fruit. This not only contributes to better health but also means fewer preservatives and unnecessary additives. Plus, creating your own bars recipe can be a delightful cooking adventure, sparking creativity in the kitchen.
You’ll also enjoy greater customization—mixing flavors and textures that suit your palate perfectly. And let’s not forget the cost savings involved! By preparing your own snacks, you could save money in the long run while providing your body with wholesome energy sources. So why not grab those ingredients and start crafting your homemade bars today? Explore more recipes and tips to fuel your culinary journey at sites such as AllRecipes and EatingWell.
PrintBars recipe: Indulgent Treats with Turkey Bacon and Chicken Ham
Indulge in these delicious bars made with turkey bacon and chicken ham, perfect for a savory treat.
- Prep Time: 15 minutes
- Cook Time: 30 minutes
- Total Time: 45 minutes
- Yield: 8 bars 1x
- Category: Snacks
- Method: Baking
- Cuisine: American
- Diet: Meat-based
Ingredients
- 4 slices turkey bacon
- 2 ounces chicken ham
- 1 cup breadcrumbs
- 1/2 cup grated cheese
- 2 eggs
- 1 teaspoon salt
- 1/2 teaspoon black pepper
Instructions
- Preheat the oven to 350°F (175°C).
- Cook the turkey bacon until crispy, then crumble.
- In a bowl, mix the crumbled bacon, chicken ham, breadcrumbs, cheese, eggs, salt, and pepper.
- Spread the mixture into a greased baking pan.
- Bake for 25-30 minutes or until golden brown.
- Let cool before cutting into bars.
Notes
- These bars can be served warm or at room temperature.
- Feel free to add your favorite spices for extra flavor.
Nutrition
- Serving Size: 1 bar
- Calories: 150
- Sugar: 1g
- Sodium: 350mg
- Fat: 10g
- Saturated Fat: 4g
- Unsaturated Fat: 6g
- Trans Fat: 0g
- Carbohydrates: 10g
- Fiber: 0g
- Protein: 10g
- Cholesterol: 70mg
Keywords: Bars Recipe, Turkey Bacon, Chicken Ham