Introduction to Red Velvet Dream Cake
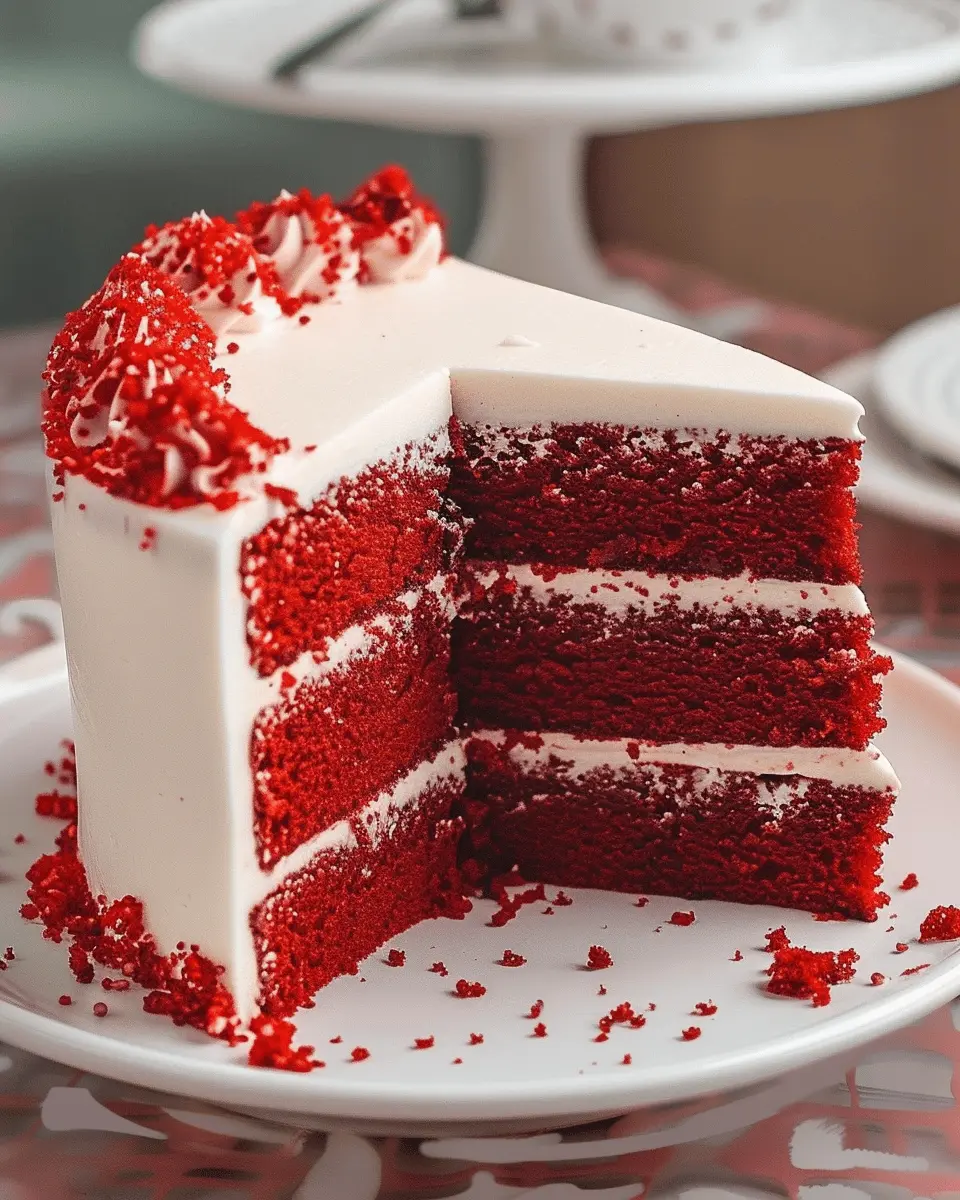
When it comes to dessert, few creations can compete with the visual allure and taste of a red velvet dream cake. Its vibrant shade of red, contrasted with layers of luscious cream cheese frosting, makes it not just a treat for the palate but also for the eyes. What is it about this cake that keeps us coming back for more?
What makes a Red Velvet Dream Cake so special?
The red velvet dream cake stands out for many reasons, blending flavors and aesthetics that appeal to dessert enthusiasts. At its core, red velvet cake features mild cocoa flavor, but it’s the red color that truly sets it apart. The unique hue traditionally comes from the reaction between cocoa powder and acidic ingredients like buttermilk and vinegar. Many people don’t realize the origins of this color explosion; it dates back to the Victorian era when bakers experimented with ingredients to enhance their recipes.
Additionally, the texture of a red velvet dream cake speaks volumes—it’s moist, soft, and velvety, offering a delightful mouthfeel that can make any celebration feel even more special.
Here are a few reasons to adore this beloved cake:
- Versatile Flavor: The subtle cocoa notes combined with the tanginess of cream cheese frosting create a harmonious balance that appeals to a wide range of tastes.
- Perfect for Celebrations: Whether it’s a birthday, wedding, or holiday gathering, this cake never fails to steal the show.
- Instagram-Worthy: Its striking red color and elegant presentation make it a hit on social media platforms like Instagram. You can easily browse inspiration on sites like Pinterest for ways to creatively adorn your own version.
Did you know that the popularity of red velvet cake has surged in recent years? According to The Food Channel, this cake experienced a 25% increase in searches over the last decade, showcasing its timeless appeal in homes and bakeries alike.
So, do you think you’re ready to dive into baking your own red velvet dream cake? It’s not just a dessert; it’s an experience waiting to unfold! Keep reading to discover the full recipe and tips for creating this stunning cake.
Ingredients for Red Velvet Dream Cake
Creating a red velvet dream cake is all about selecting the right ingredients that come together to create a velvety texture with a beautiful color. Whether you’re baking for a birthday or just a cozy night in, here’s what you’ll need:
Essential Ingredients
- 2 ½ cups all-purpose flour: This is the foundation of your cake, giving it structure.
- 1 ½ cups granulated sugar: Adds just the right sweetness to complement the cocoa.
- 1 cup vegetable oil: Keeps your cake moist and tender.
- 1 cup buttermilk: The acidity helps activate the baking soda, giving your cake that perfect rise.
- 3 large eggs: Bind the ingredients together and provide a rich flavor.
- 2 tablespoons cocoa powder: Not just for color, but to give that subtle chocolaty taste.
- 1 tablespoon red food coloring: This is where the magic happens—amount adjusts the vibrancy of your cake!
- 1 teaspoon vanilla extract: Because every cake needs that hint of warmth.
- 1 teaspoon baking soda and 1 teaspoon salt: Essential for that fluffy texture.
If you’re interested in some tips for achieving the ultimate cake texture, check out this professional baking guide. Happy baking!
Step-by-step Preparation for Red Velvet Dream Cake
Baking a Red Velvet Dream Cake is a delightful experience that combines rich flavors, beautiful colors, and a touch of elegance perfect for celebrations. Let’s break down the preparation into easy, manageable steps so you can create this stunning cake with confidence.
Gather your ingredients
First things first, let’s get all your ingredients together. The right components are the foundation of your delicious cake. Here’s what you’ll need:
- 2 ½ cups all-purpose flour
- 1 ½ cups granulated sugar
- 1 teaspoon baking soda
- 1 teaspoon salt
- 1 teaspoon cocoa powder
- 1 ½ cups vegetable oil
- 1 cup buttermilk, room temperature
- 2 large eggs, room temperature
- 2 tablespoons red food coloring
- 1 teaspoon vanilla extract
- 1 teaspoon white vinegar
Feel free to substitute buttermilk with Greek yogurt mixed with water if you prefer. This combination still delivers that lovely tang without a trip to the grocery store!
Prepare your cake pans
Prepping your pans is essential for that perfect release when the cake is done baking. Start by greasing two 9-inch round cake pans with butter or non-stick spray, and then flour them lightly to ensure no cake gets left behind. Alternatively, you can line the bottom with parchment paper if you want to play it extra safe!
Mix the dry ingredients
Now that you have your pans ready, it’s time to blend the dry ingredients. In a medium bowl, sift together:
- 2 ½ cups all-purpose flour
- 1 teaspoon baking soda
- 1 teaspoon salt
- 1 teaspoon cocoa powder
Sifting helps to aerate the ingredients and ensures that they mix together evenly, resulting in a light and fluffy cake.
Combine wet ingredients and mix
In another bowl, grab a whisk and combine your wet ingredients. You’ll need:
- 1 ½ cups vegetable oil
- 1 cup buttermilk
- 2 large eggs
- 2 tablespoons red food coloring
- 1 teaspoon vanilla extract
- 1 teaspoon white vinegar
Whisk these together until they’re well blended. The vibrant red and glossy mixture will start to come to life. It’s one of my favorite moments in the baking process!
Combine wet and dry mixtures
Carefully pour the wet mixture into the bowl with the dry ingredients. Stir gently until just combined. Take care not to overmix, as this can result in a dense cake. A few lumps are perfectly fine, and they’ll bake out in the oven!
Bake the cakes
Preheat your oven to 350°F (175°C). Now, divide your batter evenly between the two prepared pans and smooth the tops with a spatula. Pop them in the oven and let them bake for about 25-30 minutes or until a toothpick inserted in the center comes out clean.
Once baked, let them cool in the pans for about 10 minutes before turning them out onto a wire rack to cool completely.
Whip up the cream cheese frosting
While the cakes are cooling, let’s make the heavenly cream cheese frosting. You will need:
- 1 cup (2 sticks) unsalted butter, softened
- 8 oz cream cheese, softened
- 4 cups powdered sugar
- 1 teaspoon vanilla extract
In a large bowl, beat the butter and cream cheese together until smooth. Gradually add the powdered sugar, mixing on low speed to incorporate it without a cloud of sugar dust. Finish with vanilla extract, and whip until fluffy and combined.
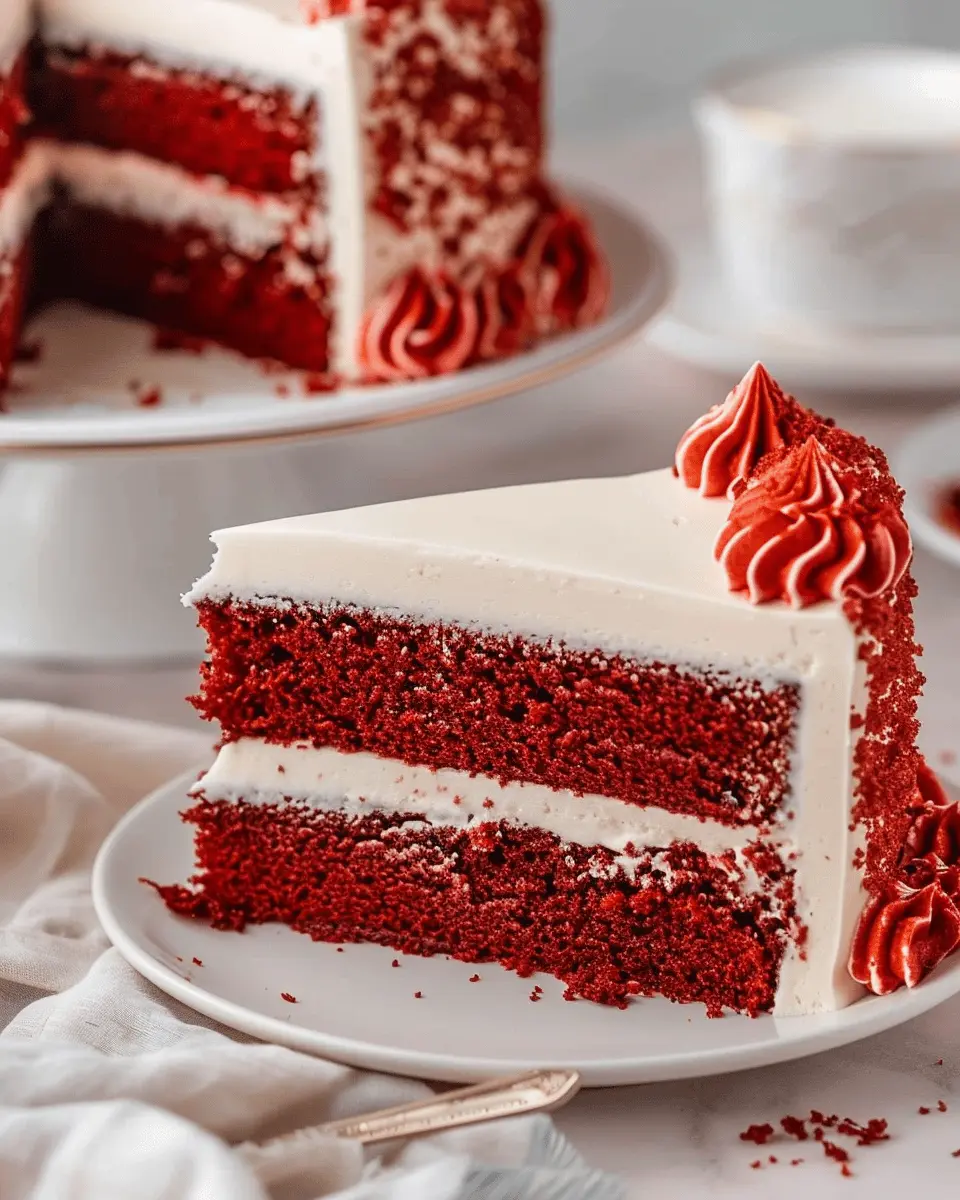
Assemble the cake
Once your cakes are cool, it’s time to bring your Red Velvet Dream Cake together! Place one cake layer on a serving platter. Spread a generous layer of frosting on top, then put the second layer on top of that. Finish by frosting the top and sides of the cake. For a touch of elegance, consider decorating with crumbs from the cake or chocolate shavings!
Enjoy slicing into your beautifully prepared cake, and don’t forget to share it with friends and family. A delicious cake not only satisfies the sweet tooth but creates memories around the table.
If you’re looking for more baking tips and tricks, check out this comprehensive resource that provides expert advice and friendly community support!
Have fun baking your Red Velvet Dream Cake!
Variations on Red Velvet Dream Cake
If you adore the classic taste of a red velvet dream cake, imagine how delightful it can be with a few twists! Let’s explore some creative variations to elevate your baking game.
Red Velvet with a Twist: Nuts and Spices
Bring a rustic charm to your red velvet dream cake by adding nuts and spices. Consider incorporating:
- Chopped pecans or walnuts: These add a delightful crunch and a nutty flavor that complements the cake beautifully.
- Cinnamon or cardamom: A pinch of ground cinnamon or cardamom can transform your cake into a warm, spiced delight, perfect for cozy gatherings.
Feel adventurous? Add a dash of cayenne pepper for a surprising kick that enhances the cake’s red hue. You’d be amazed—and your guests will be too!
Mini Red Velvet Cake Variations
Mini cakes are perfect for individual servings and add a personal touch to your dessert spread. Think about:
- Cupcakes: Transform the red velvet dream cake into cupcakes topped with cream cheese frosting. These handheld treats are great for parties or just because!
- Layered mini cakes: Stack small layers of your red velvet with frosting in between for an adorable presentation. Use mason jars for a rustic look that’s easy to transport.
If you want some inspiration, check out resources on mini baking techniques from sites like The Kitchn or Food Network. With these variations, your red velvet dream cake will never be the same again! Enjoy experimenting and making these recipes your own.
Cooking Tips and Notes for Red Velvet Dream Cake
Creating the perfect red velvet dream cake is an art, and with just a few tricks, you can elevate this dessert to a whole new level.
Master the Batter
- Room Temperature Ingredients: Always start with ingredients like eggs and butter at room temperature. This will create a smooth batter that results in a light, airy cake.
- Mixing Technique: Don’t overmix! Stir the ingredients just until combined to avoid a dense texture.
Color Matters
- To achieve that striking red hue, use high-quality cocoa powder. This not only affects color but flavor, too. If you’re unsure, check out sources like Serious Eats, where they delve deeper into the cocoa powder intricacies.
Cream Cheese Frosting
- For the frosting, let your cream cheese warm slightly before whipping it with butter. This ensures a creamy, spreadable frosting without lumps. You can even whip in a splash of your favorite non-alcoholic vanilla extract for an extra flavor boost!
Storage Tips
- If you can, let the cake sit overnight in the fridge to allow the flavors to meld beautifully. Just remember to cover it securely to keep it fresh!
These tips will help you master your red velvet dream cake and impress everyone at your next gathering. Happy baking!

Serving Suggestions for Red Velvet Dream Cake
When you whip up a stunning red velvet dream cake, serving it just right can elevate the entire experience. Here are some delightful suggestions to consider.
Pairing with Fresh Berries
Consider serving slices of your red velvet dream cake with a side of fresh berries, like strawberries or blueberries. The tartness of the fruit complements the sweet richness of the cake beautifully. Plus, it’s a way to incorporate a touch of health into your dessert!
The Perfect Beverage Companions
While enjoying this cake, a steaming cup of coffee or a refreshing glass of iced tea makes for a perfect pairing. The bitterness of coffee cuts through the cake’s sweetness, creating a balanced flavor profile. For a non-caffeinated option, try herbal teas, which can provide a soothing finish.
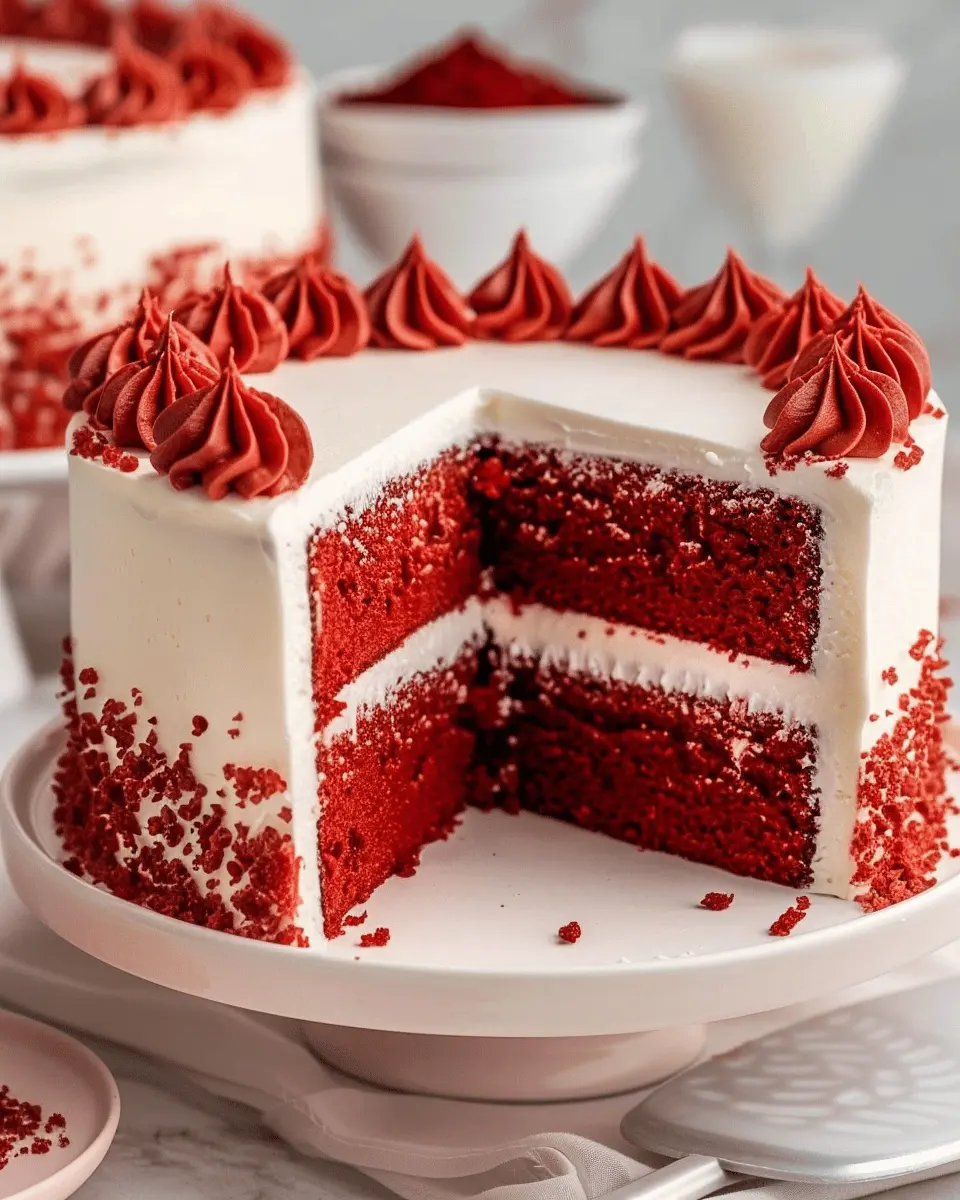
Creative Garnishes
Don’t forget about presentation! A simple yet effective way to garnish your red velvet dream cake is with a drizzle of cream cheese frosting or a dusting of powdered sugar. Add a sprig of mint for an elegant touch, and watch it transform into a showstopper at your brunch or tea parties.
If you’re looking to challenge yourself, check out ways to decorate beyond traditional cake decorating techniques with resources from experts like Joy of Baking for unique ideas!
By following these serving suggestions, you’ll make your red velvet dream cake not just a dessert, but a delightful experience for you and your guests.
Time Breakdown for Red Velvet Dream Cake
When diving into the delightful world of baking, knowing how to manage your time can make all the difference, especially when crafting a stunning red velvet dream cake. Here’s a helpful breakdown to guide you through the process:
Preparation Time
Getting your ingredients ready is the first step. Expect to spend about 20 to 30 minutes preparing your cake batter, which includes gathering your ingredients and mixing them to perfection.
Baking Time
Once your red velvet dream cake is prepped, it’s time for the oven. Bake the cake for approximately 25 to 30 minutes. You’ll want to keep an eye on it as different ovens may vary.
Cooling Time
After baking, allow your cake to cool for about 1 hour before frosting. This step is crucial for achieving a neat and delicious finish. Patience is key – you want that frosting to go on smoothly!
Once you’ve mastered your timing, your red velvet dream cake will be the talk of the town! For further tips on making your cake stand out, check out this baking guide for additional tricks and insights. Happy baking!
Nutritional Facts for Red Velvet Dream Cake
When indulging in a slice of red velvet dream cake, it’s good to know what you’re treating yourself to! Here’s a quick breakdown of its nutritional facts, which thoughtfully considers your cravings while keeping you informed.
Calories
A typical serving of red velvet dream cake has around 350 calories. This means you can enjoy a slice without completely derailing your daily nutrition goals, especially on special occasions!
Carbohydrates
Each delicious piece contains approximately 50 grams of carbohydrates. These carbs can be a quick source of energy—perfect after a long day at work.
Sugars
As delightful as it is decadent, a slice of red velvet dream cake also has about 30 grams of sugar. While this adds to its sumptuous flavor, moderation is key. Consider pairing it with a cup of unsweetened tea for a delightful balance.
Enjoying a slice of this cake can be part of a balanced diet, but be sure to enjoy it as an occasional treat. For more nutritional insights and alternatives, check out Healthline and NutritionData to help you make informed choices!
FAQs about Red Velvet Dream Cake
Can I use an alternative to buttermilk?
Absolutely! If you find yourself without buttermilk for your Red Velvet Dream Cake, you can easily create a substitute. Simply mix one cup of milk (preferably whole or 2%) with one tablespoon of vinegar or lemon juice. Let it sit for about five minutes, and voilà—you have homemade buttermilk! This swap retains the delightful moisture and tang that makes red velvet cake so irresistible.
How do I store leftover cake?
To keep your Red Velvet Dream Cake fresh, store it in an airtight container at room temperature for up to three days. If you want to extend its life a bit longer, you can refrigerate it for about a week. Just remember to let it come to room temperature before serving for the best flavor and texture!
- If you’re thinking about freezing leftovers, slice the cake and wrap each piece tightly in plastic wrap before placing them in a freezer bag. It’ll stay delicious for about three months. Just thaw slices overnight in the fridge when you’re ready to indulge again.
What’s the best way to serve this cake?
When it comes to serving your Red Velvet Dream Cake, presentation is key! Decorate each slice with a dollop of whipped cream or a cream cheese frosting swirl for an extra touch of indulgence. You might also experiment with garnishes like fresh berries or even a sprinkle of cocoa powder to elevate the look.
Cutting a perfectly sized slice not only makes it easier to share but also ensures that everyone gets a delightful taste. Considering a gathering? Pair your cake with a refreshing iced tea or a rich cup of coffee—it’s a match made in dessert heaven!
Feel free to check out more tips on cake presentation and storage at Food Network or bonappetit.com for additional ideas!
Conclusion on Red Velvet Dream Cake
The red velvet dream cake isn’t just a dessert; it’s an experience that captivates the senses. Rich in flavor and complemented by a velvety cream cheese frosting, it’s the perfect centerpiece for any celebration. You’ll find that pairing this cake with a refreshing cold brew coffee or some sparkling soda elevates the indulgence, making it a memorable treat for family and friends.
While baking, remember that patience pays off—allowing the layers to cool thoroughly ensures that each slice is as divine as the last. For more details and tips on perfecting your baking skills, check out resources from The Kitchn or Serious Eats. Enjoy your baking journey, and don’t forget to share your creations!
PrintRed Velvet Dream Cake: Indulgent Layers of Love and Flavor
A deliciously rich and visually stunning cake that brings joy to any occasion.
- Prep Time: 30 minutes
- Cook Time: 30 minutes
- Total Time: 1 hour
- Yield: 12 servings 1x
- Category: Dessert
- Method: Baking
- Cuisine: American
- Diet: Vegetarian
Ingredients
- 2 cups all-purpose flour
- 1 cup granulated sugar
- 1 teaspoon baking soda
- 1 teaspoon salt
- 1 tablespoon cocoa powder
- 1 cup vegetable oil
- 1 cup buttermilk
- 2 large eggs
- 2 tablespoons red food coloring
- 1 teaspoon vanilla extract
- 1 teaspoon white vinegar
Instructions
- Preheat the oven to 350°F (175°C).
- In a large bowl, mix the dry ingredients together.
- In another bowl, combine the wet ingredients.
- Gradually add the wet mixture to the dry ingredients, mixing until just combined.
- Divide the batter evenly between prepared cake pans.
- Bake for 25-30 minutes or until a toothpick comes out clean.
- Let cool before frosting.
Notes
- For best results, use room temperature ingredients.
- Add a pinch of cinnamon for extra flavor.
Nutrition
- Serving Size: 1 slice
- Calories: 350
- Sugar: 25g
- Sodium: 200mg
- Fat: 18g
- Saturated Fat: 2g
- Unsaturated Fat: 14g
- Trans Fat: 0g
- Carbohydrates: 44g
- Fiber: 1g
- Protein: 6g
- Cholesterol: 30mg
Keywords: Red Velvet Dream Cake, indulgent cake, dessert, cake recipe