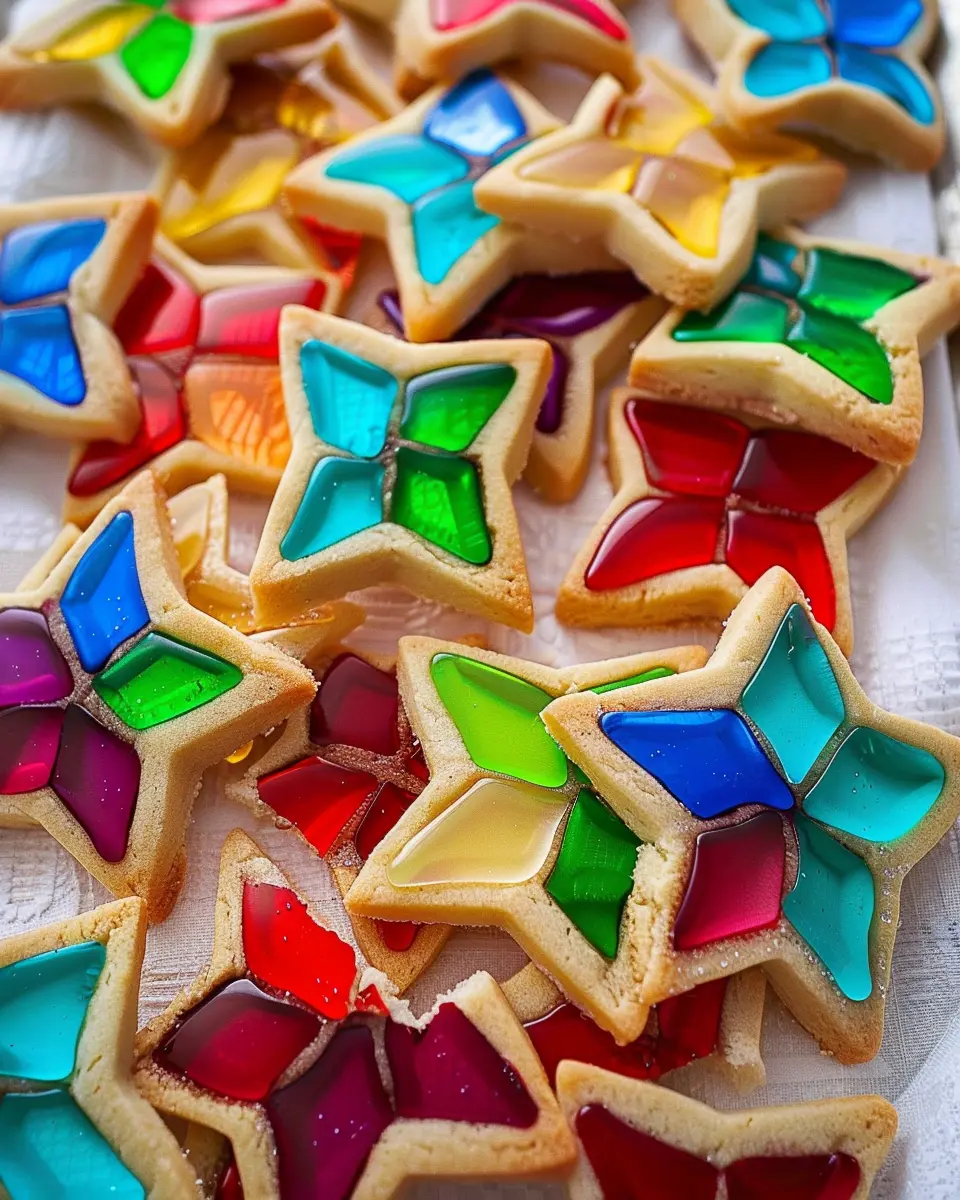
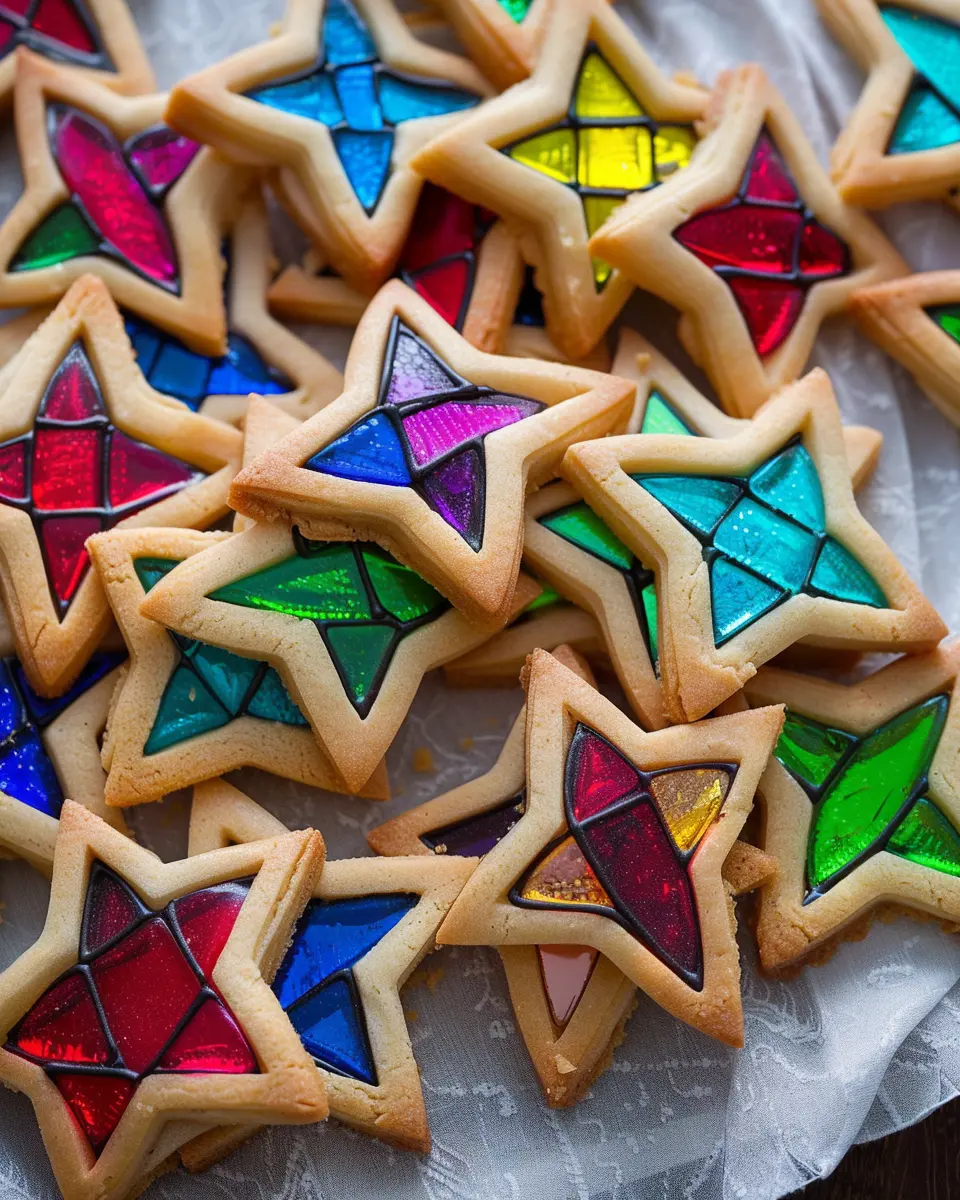
Introduction to Stained Glass Cookies
If you’re looking for a delightful way to add a little sparkle to your baking repertoire, stained glass cookies are the perfect choice. These charming treats aren’t just visually appealing; they offer a fun and simple way to explore your creativity, which is ideal for young professionals balancing a busy lifestyle.
Why Stained Glass Cookies Are Perfect for Young Professionals
Stained glass cookies are not just your average cookie—they’re like a piece of art that you can eat! The process of making them can be therapeutic after a long week at work. Picture this: You come home, the stress of the day lingers, and you decide to roll out some colorful dough while your favorite tunes play in the background. Sounds like a relaxing evening, right?
Here’s why they’re particularly great for young professionals:
-
Time-Efficient: Most recipes for stained glass cookies can be completed in under two hours, including prep and bake time. This means you can whip them up on a weekend or even after work without feeling overwhelmed.
-
Impressive Results with Minimal Effort: The colorful, jewel-like centers are sure to impress friends and family without requiring advanced baking skills. Even if you’re a beginner, you’ll love how easy it is to make these cookies look stunning.
-
Social Treats: These cookies make fantastic gifts or party favors. Bring a batch to your next get-together or share them with coworkers at the office. Plus, they look great in a decorative tin!
-
Versatile Flavor Options: While the classic version has a buttery vanilla flavor, you can easily customize the dough with different extracts, like almond or lemon, to match your taste preferences.
If you’re intrigued by the art of cookie making, you might consider checking out this resourceful guide on cookie decorating techniques for inspiration. Not only will you learn new skills, but you’ll also have a sweet excuse to indulge in delicious stained glass cookies.
With a dash of creativity and a sprinkle of fun, these cookies can become a delightful tradition that brings you joy and relaxation amidst your busy life. So, are you ready to get started? Let’s dive into the recipe!
Ingredients for Stained Glass Cookies
Essential ingredients for tasty stained glass cookies
To create beautiful and delicious stained glass cookies, you’ll need a handful of staple ingredients that come together to form this delightful treat. Here’s what you’ll need:
- 1 cup unsalted butter: This adds richness and a lovely crumb.
- 1 cup sugar: Sweetness is key, and sugar helps achieve the perfect texture.
- 2 large eggs: They act as a binder, providing structure to your cookies.
- 3 cups all-purpose flour: The foundation of your dough, giving it that irresistible chew.
- 1 tsp vanilla extract: Adding a warm, aromatic flavor.
- Candy pieces: These will create the “stained glass” effect! Choose gummy hard candies or Jolly Ranchers for vibrant colors.
For a little extra flair, consider trying your hand at sugar cookie recipes for added flavor variations.
Optional ingredients for customization
Personalization is what makes these stained glass cookies truly special! Feel free to play around with:
- Food coloring: If you’re feeling adventurous, tint your dough for extra fun.
- Sprinkles or edible glitter: These can add texture and sparkle.
- Lemon zest or almond extract: For a twist on the classic flavor profile.
Whether you’re making these cookies for a holiday or just for fun, don’t hesitate to mix and match to suit your taste!
Step-by-Step Preparation of Stained Glass Cookies
Stained glass cookies are a delightful treat that not only taste amazing but also look absolutely stunning! If you’ve ever wanted to create a festive, visually appealing dessert for your next gathering, you’re in for a treat. With just a few ingredients and some careful preparation, you’ll be able to whip up a batch that is sure to impress. Let’s dive right in!
Gather and prepare your ingredients
Before you start the baking adventure, make sure you have all your ingredients ready! Here’s what you’ll need:
- 1 cup unsalted butter, softened
- 1 cup granulated sugar
- 1 large egg
- 1 teaspoon vanilla extract
- 2 ½ cups all-purpose flour
- ½ teaspoon salt
- A variety of Jolly Ranchers or other hard candies (about 10–12)
Having everything measured out and by your side will make the process smoother, and trust me, it’ll save you time running back to the pantry!
Crush the Jolly Ranchers
Now that you have everything assembled, it’s time to prepare the candy. Take those colorful Jolly Ranchers and unwrap them all — it can be a fun and nostalgic moment! Then, for the fun part, you’ll need to crush them into small pieces. You can do this using a food processor or place them in a zip-top bag and mash them with a rolling pin. Aim for small, uniform pieces to ensure even melting inside the cookie.
A little pro tip: You can mix colors or flavors if you want a beautiful medley of colors in your stained glass cookies!
Cream the butter and sugar
In a large mixing bowl, beat the softened butter and granulated sugar together until the mixture is light and fluffy. This usually takes about 2–3 minutes with an electric mixer. The sugar will gradually dissolve, giving your cookies that perfect texture.
Mix in the eggs and vanilla
Once your butter and sugar are fluffy, it’s time to add in the egg and vanilla extract. The vanilla will enhance the flavor profile, making these cookies irresistible! Mix until everything is well incorporated and you see a creamy consistency.
Add flour and chill the dough
Now, gently fold in the all-purpose flour and salt. Be careful not to overmix; you want to see a cohesive dough form. After it’s well combined, divide the dough into two parts, wrap them in plastic wrap, and refrigerate for at least one hour. This step is crucial; it will help prevent your cookies from spreading too much while baking.
Roll out the dough and cut shapes
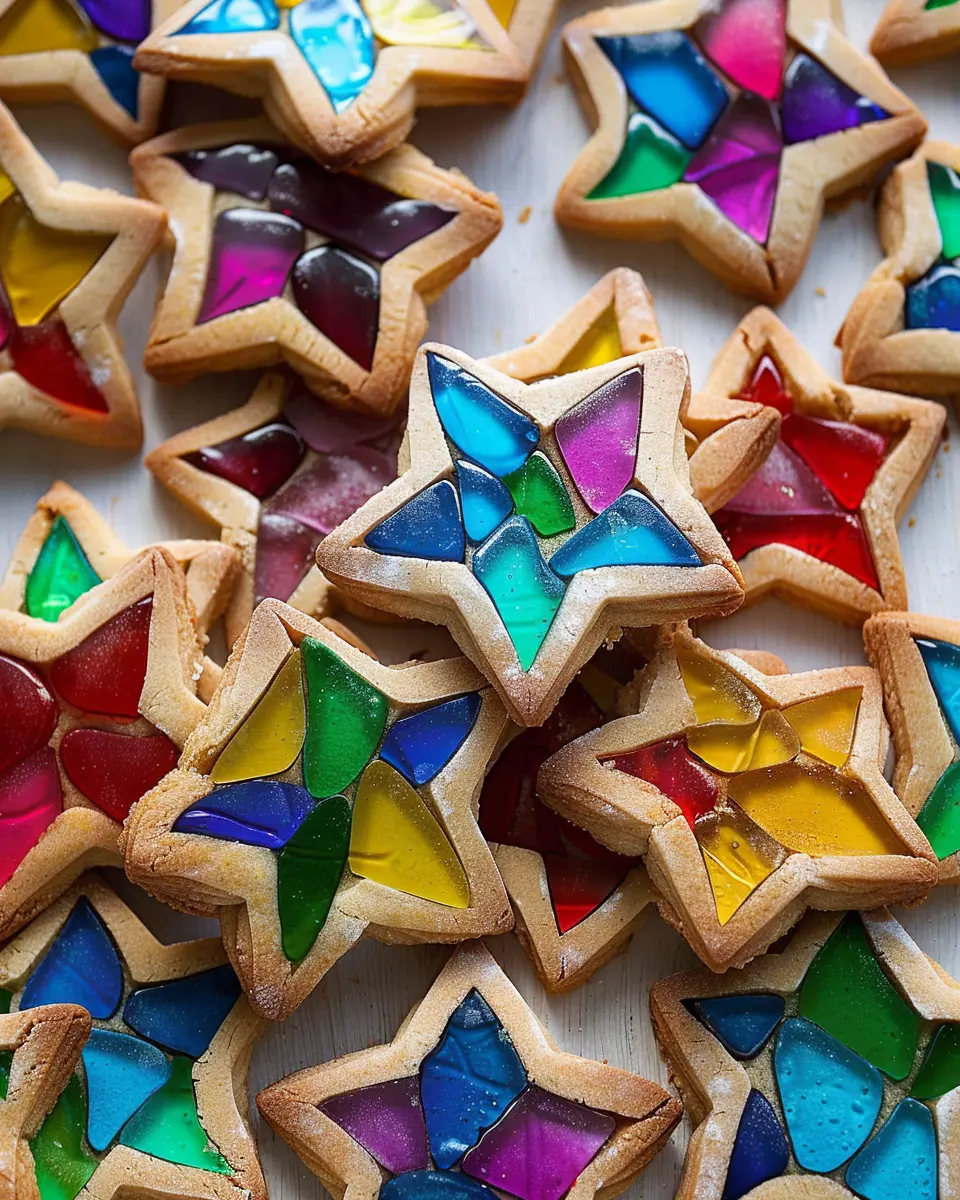
Once your dough is chilled, take one portion and roll it out on a floured surface to about 1/4-inch thickness. Use cookie cutters to cut out your desired shapes. Classic options are stars, hearts, or holiday-themed shapes if you’re making these for a special occasion.
Fill with crushed candy and chill again
Here’s where the magic happens! Place your cut-out shapes on a baking sheet lined with parchment paper. Then, create a small well in the center of each shape to add the crushed Jolly Rancher. Don’t be stingy—this is what creates the stunning stained glass effect!
Pop the filled cookie shapes back into the fridge for another 30 minutes. This chilling process helps the candy maintain its shape while baking.
Bake and cool the cookies
Now, heat your oven to 350°F (175°C). Bake your cookies for about 8–12 minutes, or until the edges are slightly golden. Keep a close eye on them, as the exact time can vary with different ovens.
Once they’re done, let your stained glass cookies cool completely on the baking sheet before transferring them to a wire rack. This cooling time allows the melted candy to set and harden—making them ready for display or, better yet, for munching!
With this step-by-step guide, you’re now equipped to make dazzling stained glass cookies that will definitely add a special touch to any occasion. Happy baking!
Creative Variations of Stained Glass Cookies
Baking stained glass cookies is a delightful way to get creative in the kitchen. These beautiful treats aren’t just fun to make; they can be tailored for any occasion. Let’s explore some exciting variations that will have your friends and family raving.
Colorful Themed Cookies for Special Occasions
Why not design cookies that reflect the vibe of your next gathering? For holidays like Halloween, you can use orange and black candies to create a spooky effect. Christmas? Think red and green isomalt shapes for a festive flair. Birthday parties are another great opportunity to mix it up—use colorful candy melts to reflect the birthday theme! Consider these tips:
- Valentine’s Day: Use heart-shaped cutters and pink or red candies for a romantic touch.
- Easter: Create adorable bunny or egg-shaped cookies filled with pastel-hued candies to celebrate the season.
- Graduation: Incorporate school colors into your cookie design.
Alternative Fillings Using Different Candies
While traditional stained glass cookies often use hard candies, feel free to experiment with various fillings. Stained glass cookies can be filled with crushed:
- Jolly Ranchers: Known for vibrant colors and flavors, these can give your cookies a fruity twist.
- Skittles: Use these chewy candies to mix textures while offering a rainbow of colors.
- Chocolate: Melted chocolate can also create a beautiful stained glass effect when cooled appropriately.
You might be asking, “What else can I do with them?” Think of combining flavors—maybe a layer of chocolate topping over crushed fruit candies for added richness.
By exploring these variations of stained glass cookies, you can make each batch unique and even more enjoyable. For more ideas, check out sites like Baking Mad for creative inspiration!
Cooking Tips and Notes for Stained Glass Cookies
Best Practices for Dough Handling
When it comes to making stained glass cookies, handling the dough properly is crucial for achieving that perfect balance of texture and flavor. Start by chilling your dough for at least an hour before rolling it out. This makes it easier to work with and helps maintain its shape while baking. If you find your dough becoming too soft, simply pop it back in the fridge for a few minutes.
Also, when rolling out the dough, dust your work surface with flour to avoid sticking. Using a silicone mat can be a game-changer as it provides a non-stick surface and makes cleanup a breeze.
Preventing Cookies from Sticking
Nothing is more disappointing than cookies that crumble upon removal from the baking sheet. To prevent this, you can line your baking sheets with parchment paper. This not only helps with sticking but also ensures even baking. If you prefer, a quick spritz of cooking spray can also do the trick. Remember to let your cookies cool on the sheet for a few minutes before transferring them to a wire rack; this allows them to firm up without breaking apart.
For more cookie tips, you can check out resources from The Spruce Eats or Serious Eats. Happy baking!
Serving Suggestions for Stained Glass Cookies
Creative Presentation Ideas for Stained Glass Cookies
When it comes to showcasing your stained glass cookies, presentation is key! Consider using a decorative cake stand or a colorful platter that complements the vibrant hues of your cookies. You might even layer them in a mason jar tied with a ribbon for a charming gift. Another fun idea is to serve them on a rustic wooden board alongside some parchment paper for a relaxed picnic vibe.
Perfect Beverage Pairings
To elevate your cookie experience, think about what beverages can accompany these delightful treats. Stained glass cookies pair wonderfully with:
- Herbal teas like chamomile or mint, providing a refreshing contrast.
- Milk—both dairy and plant-based options go well, softening the sweetness.
- Freshly brewed coffee, where the rich flavors balance the cookie’s sugariness.
Want even more inspiration? Check out this list of tea pairings. You’re sure to impress your friends and family during your next gathering!
Time Breakdown for Stained Glass Cookies
When you’re ready to embark on your stained glass cookies adventure, it’s helpful to know how much time to set aside. Here’s a simple breakdown:
Preparation Time
Gathering ingredients and mixing your dough will take around 30 minutes. Don’t rush the process; the quality of your dough sets the foundation for delicious cookies.
Chilling Time
Patience is key! Allow your dough to chill in the refrigerator for at least 1 hour. This step helps the cookies hold their shape while baking and enhances flavor.
Baking Time
Baking these beautiful cookies takes about 8-10 minutes. Keep an eye on them to achieve the perfect golden edges while preserving their vibrant stained glass centers.
Total Time
In total, you’re looking at roughly 2 hours for this project, including prep, chill, and bake time. Perfect for a weekend baking session! For more insights on baking and cookies, check out resources like the American Institute of Baking. Enjoy your stained glass cookies!
Nutritional Facts for Stained Glass Cookies
Calories per cookie
When indulging in stained glass cookies, you’ll be pleased to know they provide a delightful treat without excessive guilt. Each cookie typically contains around 90-100 calories, making them a sweet addition to your snack rotation.
Sugar content
Sugar is a key ingredient in these festive cookies, adding that irresistible sweetness we all adore. On average, you’ll find about 8-10 grams of sugar per cookie. While they are a sugary delight, moderation is key to enjoying without excess.
Key nutrition highlights
Stained glass cookies aren’t just about the sugar; they also offer some enriching elements:
- Colorful Candy Additions: The hard candy centers not only bring fun colors but also a bit of sweetness, contributing various vitamins found in certain candies.
- Fun Baking Activity: Making these cookies together is a great way to bond with friends or family, making memories in the kitchen.
- Versatility: You can tweak the ingredients to add a healthy twist, such as almond flour for added protein.
Baking can be both a delightful hobby and a pathway to healthier treats. Curious to dive deeper into baking tips? Check out the benefits of baking at home to see how it can be a fun and healthful endeavor.
Next time you’re whipping up a batch of stained glass cookies, consider sharing them with friends or bringing them to a gathering—they’re sure to be a hit!
FAQs about Stained Glass Cookies
What should I do if my cookies spread?
It’s a bummer when cookies spread too much, especially when you want those gorgeous stained glass effects! If you notice this happening, check a few things:
- Chill the Dough: Make sure you’ve chilled the dough for at least 30 minutes before baking. This helps it hold its shape.
- Flour Measurement: Double-check your flour measurement; sometimes, adding a tad more flour can help. You want it to be soft but not sticky.
- Baking Temperature: Ensure your oven is preheated to the right temperature. An oven that’s too hot can cause unwanted spreading.
For further guidance, you might want to read about common cookie baking issues at Bakers Edge.
Can I make the dough ahead of time?
Absolutely! In fact, making the dough ahead of time can be a smart move when you’re busy. You can refrigerate it for up to three days before baking. Just wrap it tightly in plastic wrap to keep it fresh. Alternatively, you can freeze the dough for up to three months. Just remember to thaw it in the fridge overnight before rolling it out. Planning ahead means more cookie fun when you’re ready!
How can I store leftover cookies?
Storing your stained glass cookies properly will help keep them fresh and tasty. Here’s how:
- Airtight Container: Place them in an airtight container at room temperature. They’ll stay fresh for up to a week.
- Layering: If you’re stacking them, put parchment paper between layers to prevent sticking.
- Freezing: For longer storage, you can freeze them. Just ensure they’re fully cooled before wrapping individually in plastic wrap and placing them in a freezer-safe bag.
You’ll find that taking care of those leftover cookies is just as important as baking them! For additional tips on cookie storage, check out the insights at Serious Eats.
Now, armed with this information, you’re all set to create the most delightful and beautiful stained glass cookies! Happy baking!
Conclusion on Stained Glass Cookies
Recap of Why These Cookies Are a Delightful DIY Treat
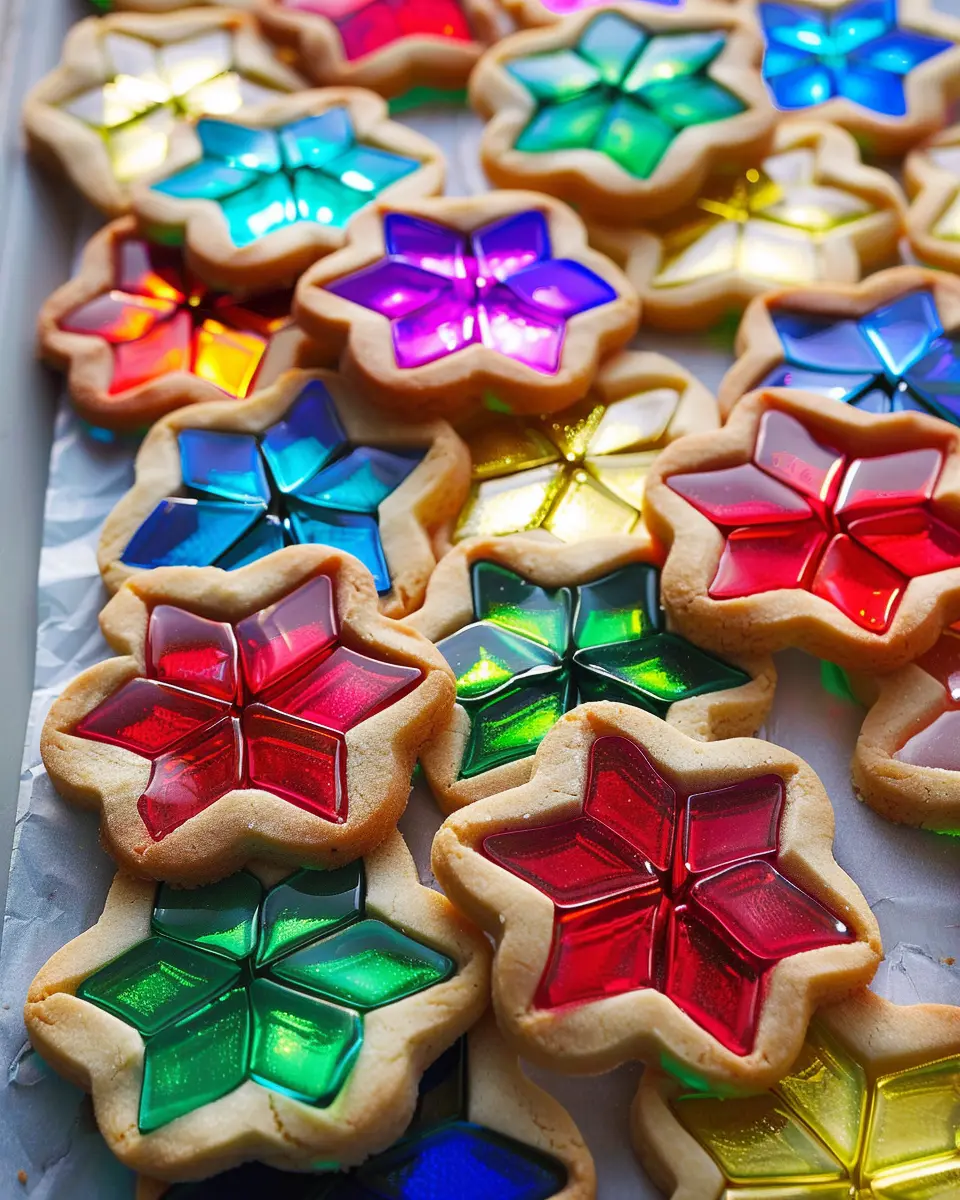
Stained glass cookies are not just a visual treat; they’re a wonderful way to let your creativity shine in the kitchen. With their vibrant colors and whimsical designs, these cookies can brighten up any holiday gathering or special occasion.
- Easy to make with just a few simple ingredients
- Offer endless design possibilities for personal flair
- Provide a fun activity to share with family or friends
Next time you’re in the mood for some baking, give these stained glass cookies a try. They embody the festive spirit and are sure to impress your guests. For more baking inspiration, check out Baking Better.
PrintStained Glass Cookies: The Best Easy Recipe for Festive Joy
A delightful recipe for stained glass cookies that brings festive joy to any occasion.
- Prep Time: 15 minutes
- Cook Time: 10 minutes
- Total Time: 1 hour
- Yield: 24 cookies 1x
- Category: Dessert
- Method: Baking
- Cuisine: American
Ingredients
- 2 3/4 cups all-purpose flour
- 1 teaspoon baking soda
- 1/2 teaspoon salt
- 1 cup unsalted butter, softened
- 1 1/2 cups granulated sugar
- 2 large eggs
- 1 teaspoon vanilla extract
- 1 teaspoon almond extract
- 1 cup crushed hard candy (like Jolly Ranchers)
Instructions
- Preheat the oven to 375°F (190°C).
- In a bowl, whisk together flour, baking soda, and salt.
- In a separate bowl, beat the butter and sugar until creamy.
- Add the eggs and extracts, mixing until fully combined.
- Gradually add the flour mixture to the wet ingredients.
- Chill the dough for at least 30 minutes.
- Roll out the dough and cut into shapes, removing a center piece to make space for the candy.
- Fill the center hole with crushed candy.
- Bake for 8-10 minutes or until edges are golden.
- Cool completely before serving.
Notes
- For best results, chill the dough overnight.
- Experiment with different flavored candies for unique colors and tastes.
Nutrition
- Serving Size: 1 cookie
- Calories: 100
- Sugar: 10g
- Sodium: 60mg
- Fat: 5g
- Saturated Fat: 3g
- Unsaturated Fat: 2g
- Trans Fat: 0g
- Carbohydrates: 15g
- Fiber: 0g
- Protein: 1g
- Cholesterol: 20mg
Keywords: Stained Glass Cookies, Christmas Cookies, Festive Baking